Monday, 9 September 2013

First Commissioned Tatted Necklace

Hi folk

just thought I'd put up for anyone interested the design ideas behind this necklace.  I had a pretty free rein really and it just needed to be something modern, not flowery and fairly large but not heavy.

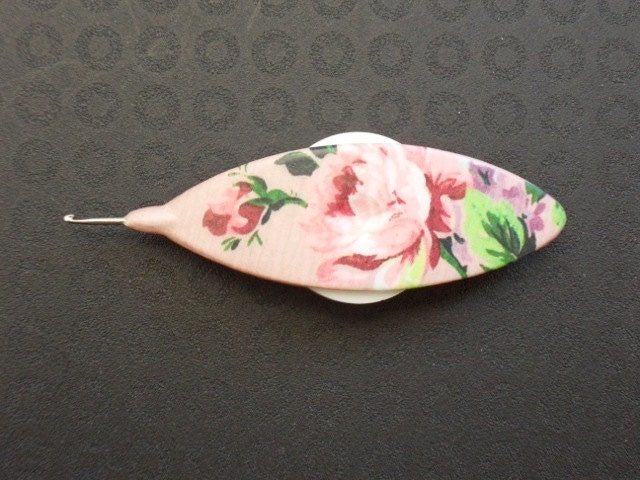
I have had the doughnut in my stash for years and thought it would make a good centerpiece and picked a thread I thought would match well, a very soft silky thread that I'm afraid was given to me so I really have no idea what it is. As it was a soft thread it really needed to be needle tatting, I don't think it would have stood up to all the twisting I seem to add to shuttle tatting.

So the intricacies of my design process, I popped the bead down on some paper and drew some loops round it. That's it really, and I wanted a gradually increasing chain so just increased the amount of knots on the way round, keeping note of the amounts so I could decrease the same on the way back round the other side.  I wanted the fastening to be easy to do, but also to look like it was in keeping with the rest of the design, so I chose a toggle button and added a loop large enough for it to fit though right at the beginning.
about to start the centre design

I had worked out, by measuring and counting, that I was tatting at 5 knots to a cm, so using a flexible ruler I just measured the loops as I got to them and tatted accordingly.
Then I repeated the chain on the other side to complete and added a toggle at the end.


And wrapped up lovely to go.
Well thanks for stopping by and please do leave some comments, its always lovely to read your thoughts.
thanks ally x


Tuesday, 20 August 2013

Tatted flowers for the peg bag

So nice sitting in the sunshine
Hi Folks,

First attempts on that tatted flower pattern:

First Attempt 

Problems noted in the first flower 
1. need a slightly bigger area in joining the first circle.
2. forgot to leave a picot on the first petal
3. I tatted these is Twilley's Lyscordet cotton no.5, colour: rose but I don't think this was such a good move.  It really does not tat well becoming shabby and unwound if you know what I mean. I tried to show it in the picture.

Close up of a join of a petal
and shabby thread
picot on first petal

And the dog came to help
A very rough diagram of the pattern and here it is tatted up.


Just remember that this isn't mine I got the picture from Pinterest  http://pinterest.com/pin/565483296932672889/ http://atelier.woman.excite.co.jp/creation/34706.html#  

Well next time I'll hopefully have some sewn on a finished peg bag. 
Wish me luck. 
ally x

Friday, 16 August 2013

update on peg bag

Hi crafty people of the internet world

Just a little update on this blog today as the major news was happening in honey pot creations, but since it has been quite a while since I told you about the plans to crochet a peg bag I thought it only fair to let you know how I have been getting on.

Well not as quick as I had hoped, the 4.5 hook and dk yarn is crocheting up slowly so I have not as yet finished but one more good evening at it and I think I will be there.  I have just completed the opening for the pegs to come out off so only really need to do a couple more inches before finishing it off.

This was me testing to see if it was big enough to get all my pegs in, you can see it has gone a little lumpy.  In hindsight I should have made more effort to ensure the yarns were of the same weight, as the green was considerably finer and consequently a round of green was smaller than a round of cream, and the pink was in the middle but closer in size to the cream, but since it is only for me and I think I can iron it out and once hanging from a line it will fall differently, I can put up with it.


For the opening I stopped DCing and crocheted a chain of 23 stitches and then took up DCing 23 DCs further on on the round, continuing as normal next time round.


Also I found a lovely tatted flower on Pinterest, that I will try for the embellishments, the website is Japanese, but you can work out what's needed. The little loop at the top is for hanging if you plan to put it on a necklace or the like, so I will miss that bit off.  http://pinterest.com/pin/565483296932672889/ http://atelier.woman.excite.co.jp/creation/34706.html#


tatted flower motif - Japanese patternMore pictures soon once I've finished it. Well that 's all for now, I got stuff to do. Keep well all and I'll be in touch soon.

love ally x

Tuesday, 6 August 2013

holiday washing

howdy folks, 

Well, back from holiday camping can mean only one thing, a mountain of washing, and as I was hanging out yet another load I decided to finally get on with it and make myself a retro style peg bag.  

As any self respecting vintage girl, how could I have gone so long using the modern plastic bag that I think came from the front of a magazine?  I had chide myself several times in the past, but never enough to get on and do something about it, but this time I felt different, the house is getting more complete, and stepping out of my 40s/50s style kitchen I really felt the need for a nice little crochet peg bag. 

So upstairs I went to to the sewing room, opened up a box of wool and rummaged, and these are the colours I came up with.

I had no pattern in mind just thought I'd do a reasonable length of chain  and then work up both sides to form a bag, leave a slit at a reasonable height and join it off at the top when its big enough, in random stripes of colour and maybe a bit of the dark pink tatted up for decoration. So I thought I'd show you how I do a foundation chain to make it easier to crochet to down either side of it. This is something I do often when making a bag that isn't round based. I do a little more to each stitch  than a simple chain and I hope that the photos will show it well enough, but please let me know if you need more explanation. 

 Firstly complete 2 chain stitches then put the hook through the first loop, yarn around hook and pull back through first loop on hook, yarn around again and then through both loops


2 chains

hook through 1st loop

yarn pulled through 1st loop

yarn pulled through both loops
Then you put the hook through the side of the bottom of the stitch you just created and do the whole thing again.
hook through bottom of stitch

 The chain a bit longer and the hook through the bottom of the stitch.

A further stitch completed

3 SC in the last chain to enable the flow of stitches
 round to go down the other side
It then becomes very easy to crochet down the other side.


both sides completed
 
to give a bit of a base I did a 3 increase at the end and 2 increase in the stitch either side of the end.


The base starting to build upwards.
And this is how far I have got, a couple more nights should see it completed, then I will need to get the saw out to chop a wooden coat hanger down to size, hopefully next week's washing will be retro style.

see you all soon 
luv ally x

Friday, 19 July 2013

that holiday feeling

Well folks,

I have to say I woke feeling rather woolly headed today.  Last night was the summer sing-along of the ukulele band I'm privileged to be part of, Moselele.  It was great we had the audience standing on table and chairs at the end, dancing and signing.  What with the lovely weather and being outside, everyone had a brilliant time, but I didn't get to bed till the wee hours and had had a couple of pints (may be more), so the alarm clock this morning was not to welcome.

But today is a very exciting day and I really need to be fairly tired for tonight anyway, we are off camping tomorrow, yippee.  So today I am gathering the stuff from round the house and in the garage and check it is all ship-shape still, bit late if it isn't, but I'm fairly confident....

Then a nice early night and a 4.00am (yes that's right a 4.00am) start.  It's a time I am more familiar with coming at from the other side on my way to bed, not struggling to get out of bed for, but we have discovered over many years of making this journey, it is really the best way to do it. We beat the traffic, which can really mount up on the way to Cornwall, first holiday week of the summer, get to the best spot in the campsite, same one every year, but we love it, and in the heat it will make for a much more comfortable drive.  To be honest I love the drive, the mist as the sun comes up over the countryside, the excitement of finally being on our way.

So today, I need to be motivated throughout, lots of tea to keep the woolly head at bay, and by the time I get back from holiday I will, (should)(hopefully) have lots of lovely tatting pictures for you from the seaside.

Needle tatting a little something I thought would look nicer
than buttons on the hat I'm working on at present
But in the meantime here is a little of my needle tatting in action,  See I have done some stuff, just haven't time to organise the post. You never know you might get a late night edition of it, if I am too excited to sleep, but to be honest, I think I could lay my head down on the laptop and drift off right now.  Thursday is not the best night for a party, but my it was worth it.  If you ever get chance take up ukulele, in my humble opinion, it's tops.


Well I hope you all are having a wonderful time, remember to drink lots of fluids, and keep in the shade.  I am signing off for two weeks, I have enjoyed the challenge of a post a day, although I haven't actually done it, only missed 1 day I think, but it has been quite useful in getting me disciplined. So thank you all for reading, and don't forget comments are always welcome too.

hugs and kisses
ally x

Thursday, 18 July 2013

tatted heart


Well yesterday I told you about a lovely blog, by Frivole   Further searching and I happened upon this lovely lady's Etsy shop too, http://www.etsy.com/uk/shop/LaCossette

The Heart Within - TATTING PATTERN with variations
 and could not resist buy a delightful heart pattern with instant download, yesterday evening I eventually settled down to a little tatting and here is what I managed...

The initial instruction was to load up two shuttles with the same thread, I could only find 1 empty shuttle yesterday, so I only completed the instructions down to the first split ring, but still it was very nice to be curled up on the sofa and tatting, I did a little telly catch up and watched an episode of the White Queen, have to say I'm thoroughly enjoying the series and love the costumes.

This evening I will probably continue by use a tatting needle rather than shuttle for the second half and see how that manages.

Back to the pattern; it is really well written and has 3 variations included with it, so very good value I think.

Tatting Shuttle AERLIT (Rose & Lilac)  -  Vintage Series


 She also sell the sweetest shuttles I ever seen, so I'm planning on getting a couple of these.


till next time
ally x

Wednesday, 17 July 2013

summer sun


Well folks

The weather is still amazing, and I feel much more incline to spend my free time pottering around outside rather than inside, and this leads me to a slight apology. Sorry no post yesterday and no tatting today.

We moved house back in April, quite a while you might think, time to get sorted and to know where things are, surely, well yes, but in our defence the house has involved a lot and I mean A LOT of DIY, which we haven’t completed yet. So when I say I can’t find the tatting I have been looking for to put up some pictures it is true, and with the weather being so good, I haven’t the heart to spend hours searching.  One good thing though was I found a box which I thought contained just some corsets I had made over the years and in fact it contained a lot of my summer skirts, so each day this week I have been swirling about in another lovely skirt, some I had completely forgotten about, oops. So I was very please with that.

Another thing I am pleased with is that after work yesterday I was able to purchase a flexible ruler, protractor, and bendy curve ready to start drafting my bra cup, I have read and re-read the instructions for just the drafting part several times and now feel competent to have a go, in actual fact it doesn’t seem as bad as I originally thought, although I may update that once I have had a go. Didn’t manage to get to it last night as it was puppy training, but tonight I am determined to get at least an hour on it, wish me luck.

In the mean time check out this girl’s tatting I think she is phenomenal.


http://leblogdefrivole.blogspot.co.uk/


enjoy the weather.
hugs
ally x